
Related: RipX DAW for Musicians
Try Free for 21 Days
RipX DAW splits any song into its individual instrument layers, also known as stems. Furthermore, the software separates out each individual note from every stem, allowing musicians to slow parts down, isolate the guitar, and view note pitches on the piano roll as the track plays. You can even mute the guitar parts to create backing tracks and practice your own parts, improvise, or record your own variations!
Viewing individual notes on the piano roll is often enough to learn most guitar parts, but if you’re struggling to recognize chords or want to learn fingerings with different capos, RipX DAW has you covered. You can slow down the recording to practice at any tempo, allowing you to build up technique, accuracy and confidence.
Step 1 – Rip a recording containing a guitar part you want to learn, practice, re-record or edit
After launching RipX DAW, simply drag and drop your audio or video files (video works on Mac only) onto the DAW, or click the file icon to select your recordings to rip. It really is that easy to get ripping!

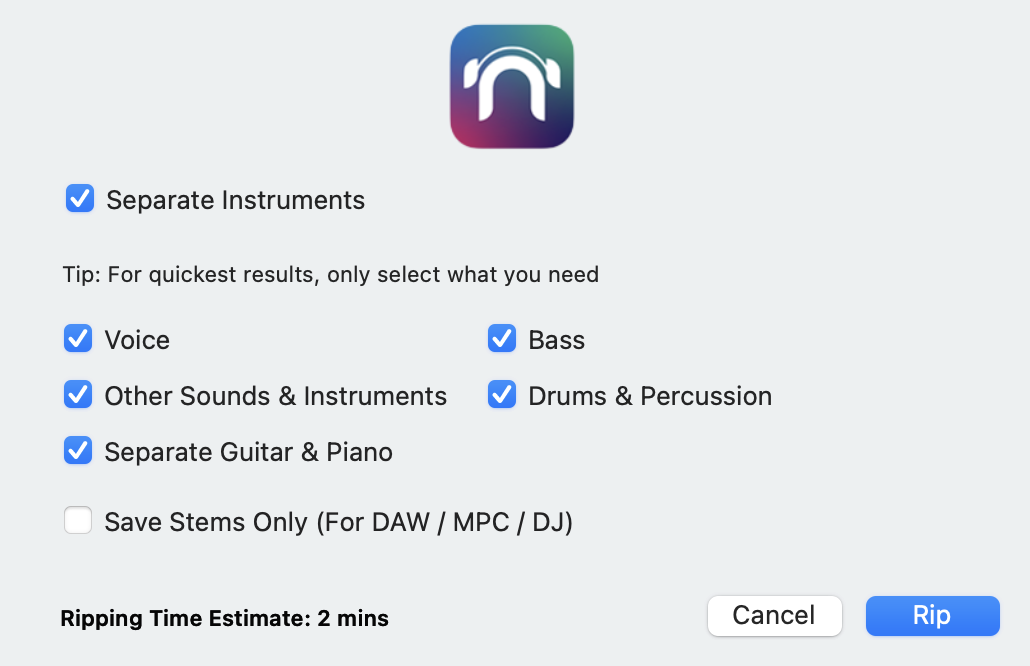
The Ripper Options dialog box will appear, and you can choose which stems you’d like the song to be split into. For example if you are looking to learn a guitar part, you’d want to select “Separate Guitar & Piano” along with any other stems you’d like to see.

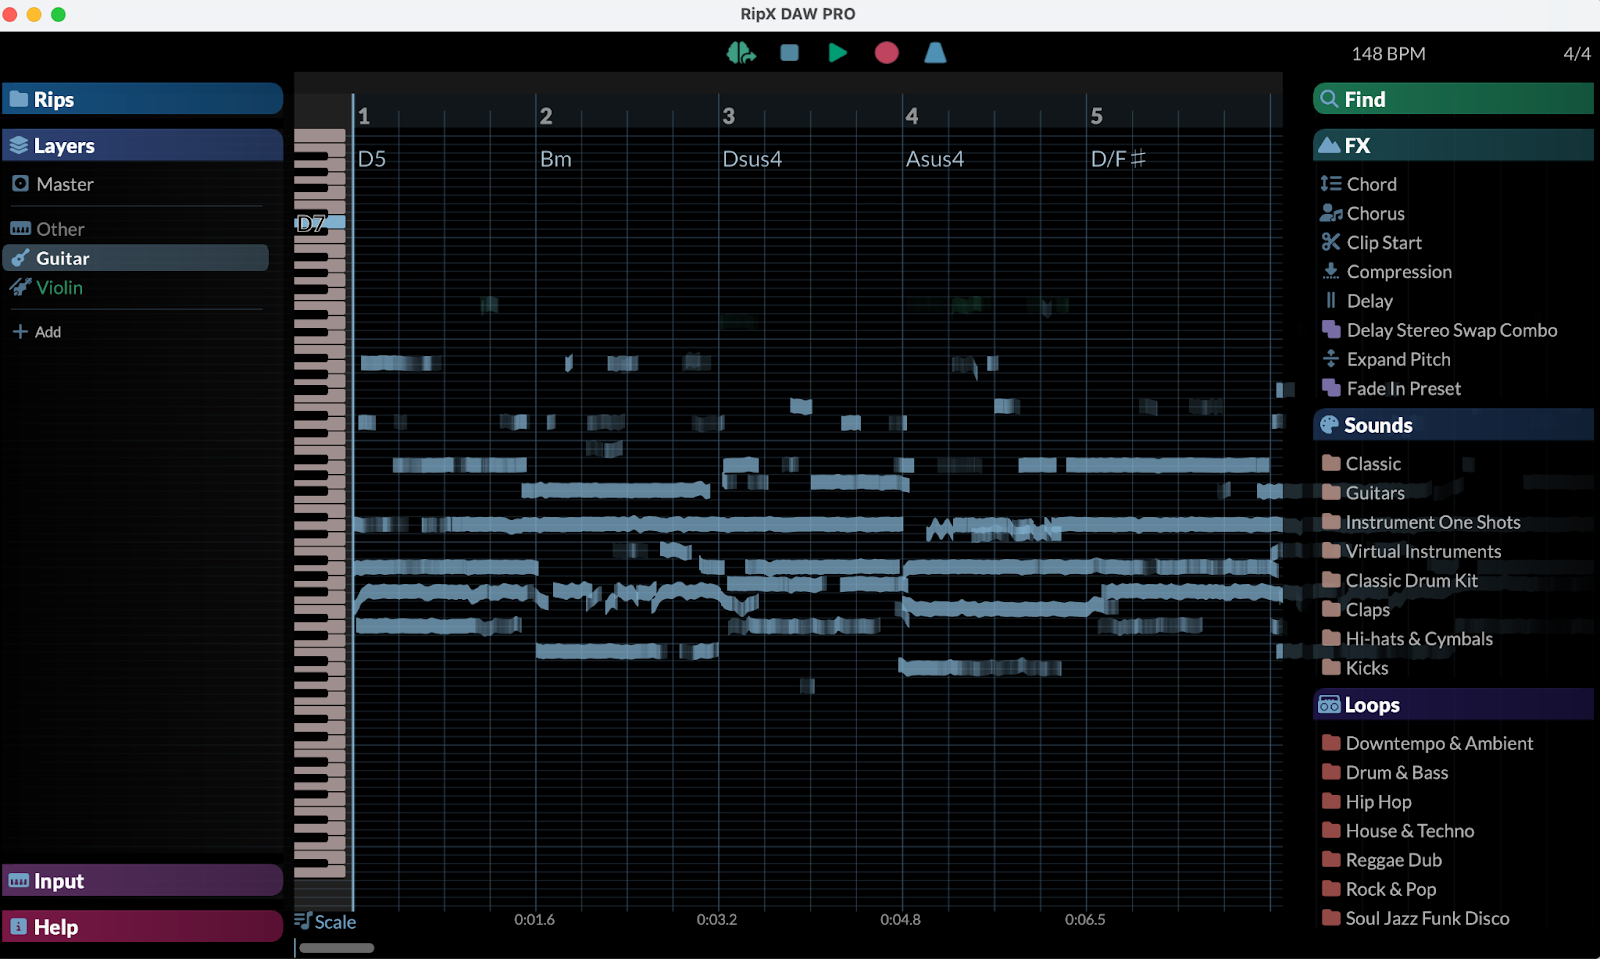
After ripping, your songs will show as Rips in the Rips Panel to the left. Double-clicking on a Rip opens it and displays its notes in colors that correspond to the instrument groups to which they belong.

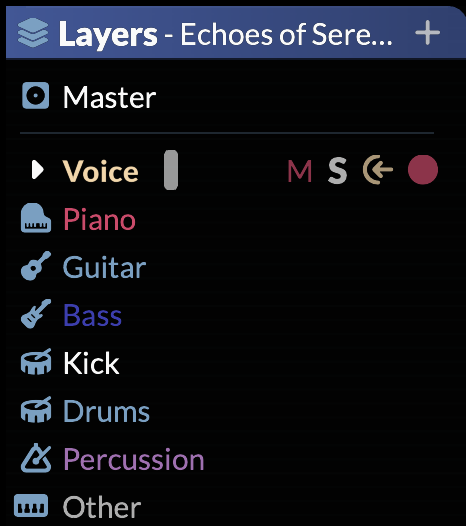
Once a Rip is opened, you’ll see the Layers Panel on the left side of the screen. From here, you can double click on a Layer to view the notes contained within that stem. You can also mute, solo or adjust the volume of these individual instruments.
Step 2 – Begin Learning

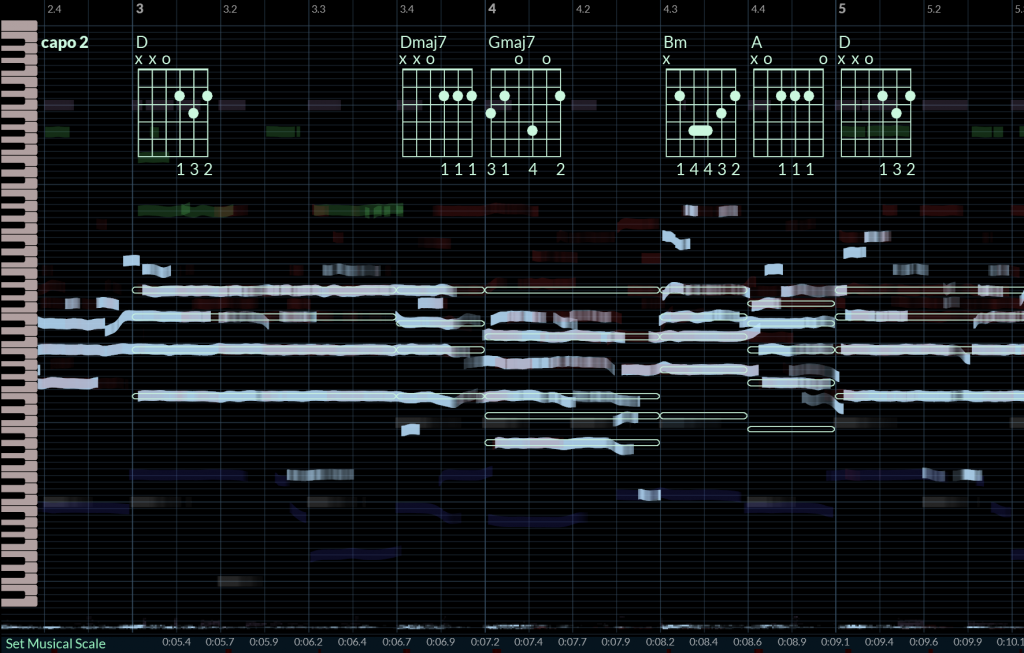
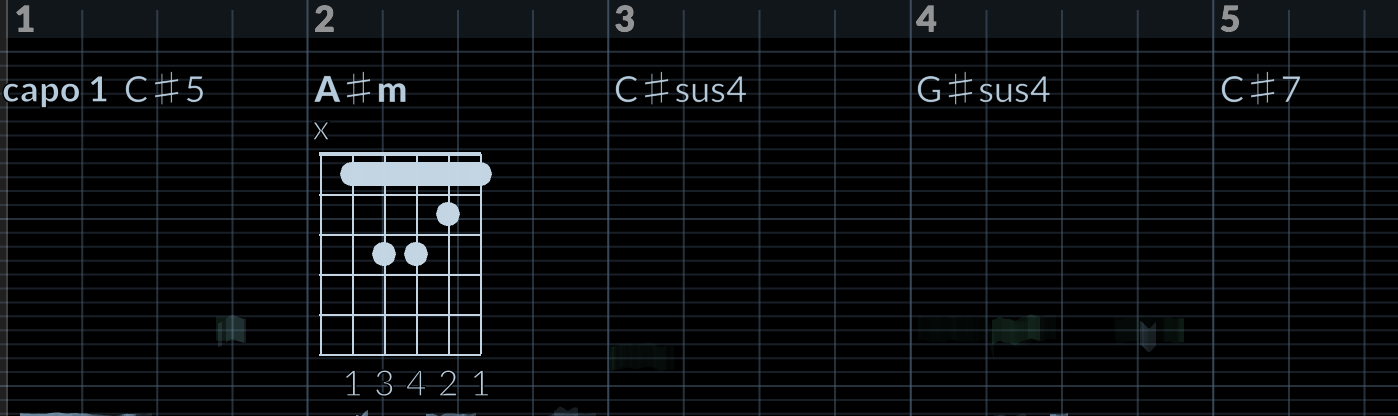
Click the Guitar layer in the Layers panel and you will see the notes and chord symbols appear in the timeline. Hover over a chord symbol to see the chord diagram with fingering, in addition to overlaid note pitches. Click a chord symbol to toggle showing chord diagrams for all chord symbols on screen.
Zoom in by clicking and dragging the timeline down to view chord symbols calculated for specific beats, and zoom out to see symbols for entire bars. Chord recognition works best when RipX accurately identifies barlines, so check their positioning first. If needed, adjust by clicking and dragging the first barline from the bar number region at the top, and each subsequent one to the correct spot (the cursor will change to a <-> shape when hovering over an adjustable barline).
If any guitar notes have been incorrectly recognized as another instrument, you can manually move these notes into the guitar stem. You can also move any misidentified notes out of the guitar stem. Do this by highlighting the misidentified notes and hitting the arrow next to the correct instrument Layer.
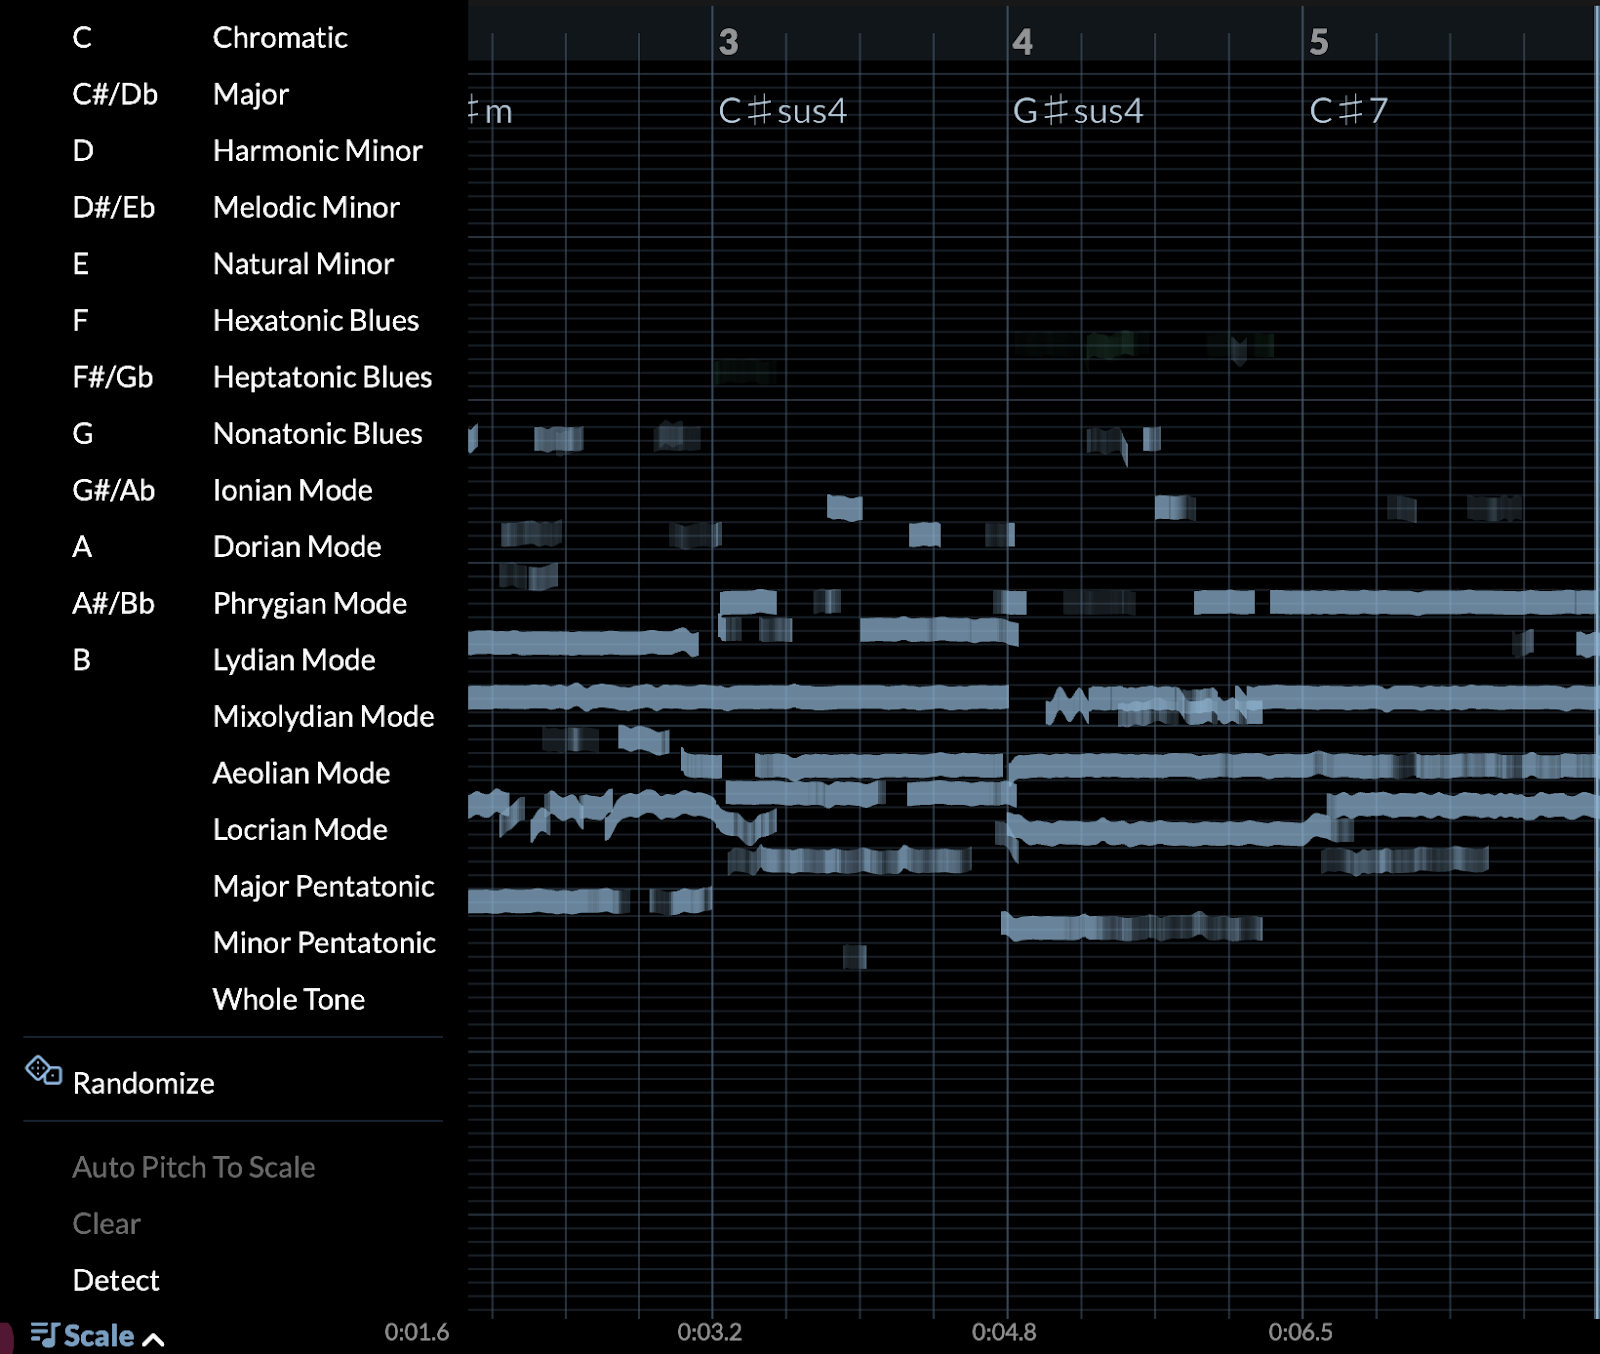
Step 3 – Viewing Scales, Capos and Fingerings
When the song is imported, you have the option to manually set the scale, or have RipX auto detect it. To do this, click “Scale” at the bottom left of the timeline and select the appropriate option.
Along with chord charts, RipX DAW can also display the capo fret for each chord. Right-click any chord symbol to rotate through each capo, showing the relevant fingering and pitches used.
Step 4 – Record your own guitar chords and performances
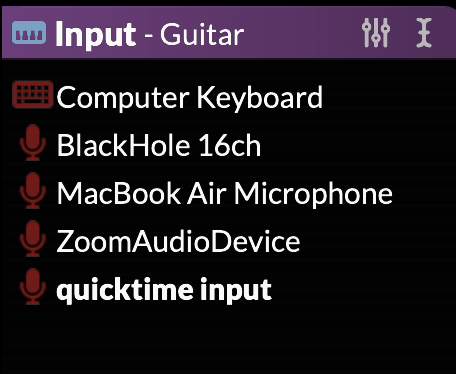
To record your own guitar part over an existing Rip, simply mute the original Guitar layer, create a new Layer, select your guitar/soundcard input in the Inputs Panel, and then press record. Wait for the count-in to end before playing and recording in real-time.
This is a similar process to recording a guitar part into an audio track within another DAW, except you are now recording in the Rip Audio Format. This enables you to see your newly recorded notes and chords as you perform, and then allows you to tweak the individual notes once you’ve finished. This offers invaluable flexibility and creative control to fit all of your needs.
After recording, you can take things further by adding Effects and even transforming or blending your notes and chords into other instruments or sounds – such as changing your guitar into a bass, or blending guitar tones together. It’s really endless fun (if we do say so ourselves)!
Go pro and add-on or purchase the RipX DAW PRO
Purchase RipX DAW PRO to deeply clean and fix recordings using our award-winning Audioshop® tools. Adjust timbre, pitch, and timing, and edit unpitched audio separately from pitched sounds. Work standalone or with your DAW to create high-quality extracted audio and edit stems with unmatched precision using RipX DAW PRO.
Disclaimer: Screenshots are for illustrative purposes only and are not intended to be indicative of recommended or authorized use.
I’m a guitarist and keyboardist that would like to make backing tracks to play along to.
Plus I also intend to use RipX to help me transcribe.
I’d like to know when you’ll be having a sale/ discount so I can save up to purchase?