
In this blogpost, we’ll cover some of the most popular usages of our award-winning RipX PRO, and provide a step-by-step guide on how to use the software for the most common noise clean-up use cases in music and audio post production. Need the highest-quality yet easy-to-use noise clean-up software? Grab a free, 1-Month trial of RipX DAW.
Whilst RipX DAW PRO already provides users with superior stem clean-up capabilities as covered in a recent blogpost, it’s also an invaluable tool for all kinds of professional users needing to fix, clean-up and repair audio.
After ripping a variety of files in RipX DAW PRO, you can easily access any background or foreground noise that you may want to remove, or reuse/boost for effect. This could be vinyl crackle, knocks, coughs, twangs, additional strings played, breath, bleed from other vocal parts or voiceovers, instruments and percussion, traffic, wind, fan hums, crowds, breaths and much more.
RipX DAW PRO’s Harmonic Editor and the Edit Unpitched Tool are especially useful in editing close or overlapping frequencies which are usually difficult to access cleanly in a spectrum-based editor.

Using DeepAudio, you can even extract artifact-free dialog from noisy footage, clean-up individual harmonics with surgical precision, edit audio to video (macOS only), adjust vocal sibilance and digitize and clean-up crackly vinyl. Let’s take a look at some typical noise clean-up use cases and how to process them using RipX DeepAudio.
Step 1 – Choose files for clean-up

A common audio post production and music production clean-up task often involves erasing mix pops, clicks, coughs and other background noise such as fans, hums, traffic and crowd noise from a film/tv scene or vocal/instrument take.

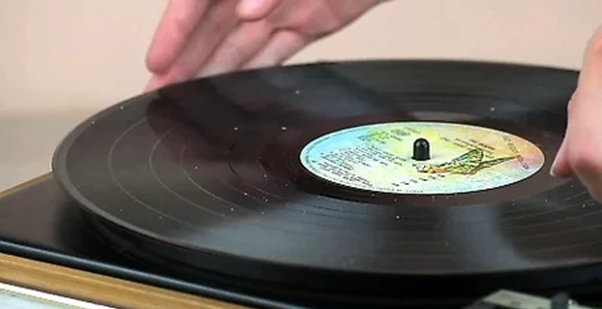
Alternatively, you might want to digitize your vinyl collection via a sound card and audio editor/DAW for listening to on a mobile phone, mixing on a laptop or via a pair of CDJs. However, depending on the cleanliness of your vinyl, the recording quality may not always be ideal.
In either of the above scenarios, simply locate the video (MP4, M4V or MOV) or music files (MP3, WAV or AIFF) you want to clean or have recorded and drag & drop them into RipX for ripping.

Step 2 – Rip
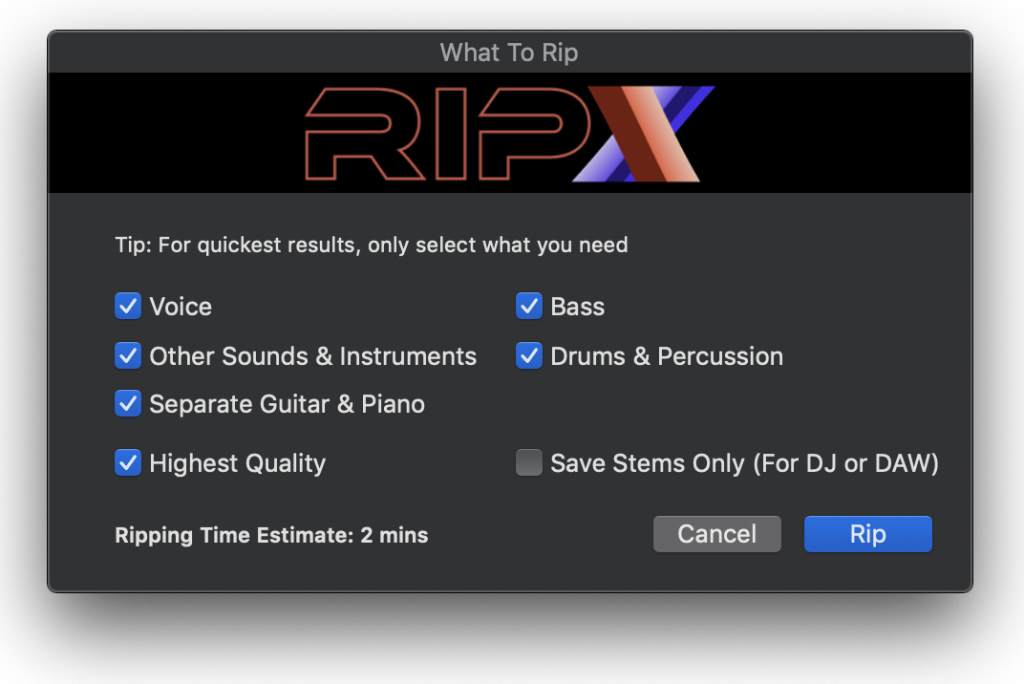
In all of these clean-up scenarios, when the Ripper Options dialogue box appears, it’s often best to ensure that all instrument/sound options and High Quality are selected in order to make sure that as much detail as possible is presented for identifying and cleaning up.

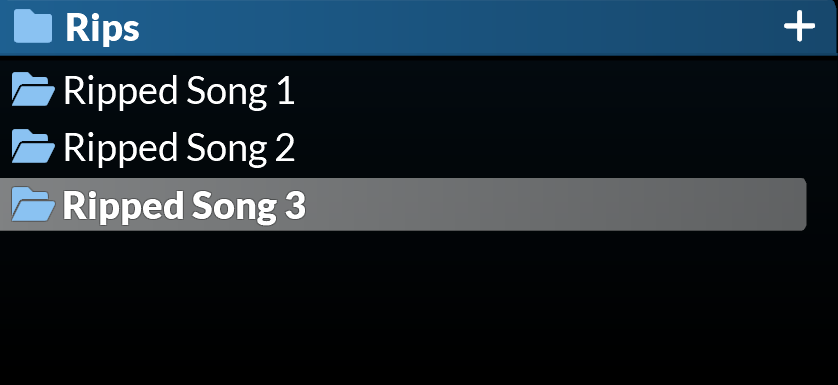
After ripping, your songs will show as Rips in the RipList Panel to the right. Double-clicking each Rip in the RipList will display its contents with notes in colors that correspond to the parts to which they belong.
Step 3 – Clean-Up, Fix & Repair
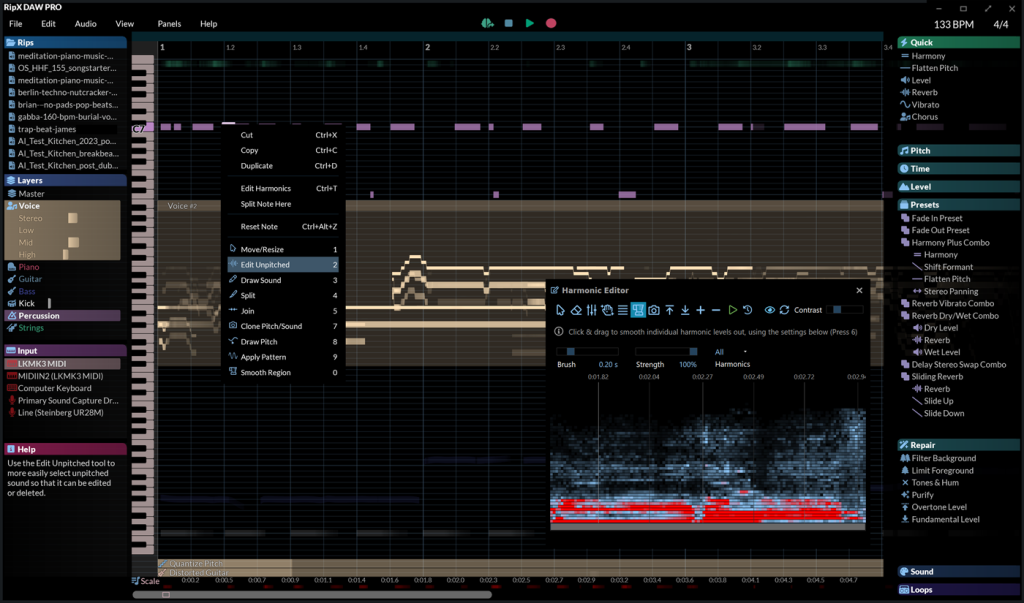
One clean-up use case is to use the Edit Unpitched Tool to select and delete any unwanted noise in the Rip.
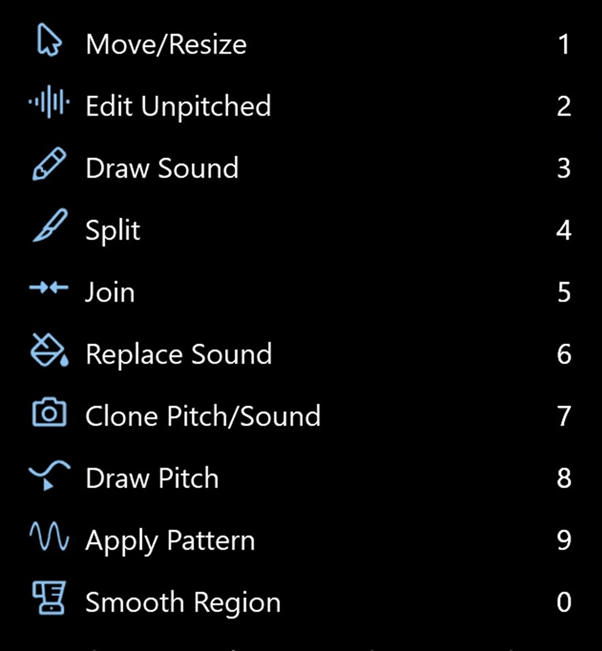
To access the Edit Unpitched Tool, right-click on the Rip with your mouse to be presented with this menu.
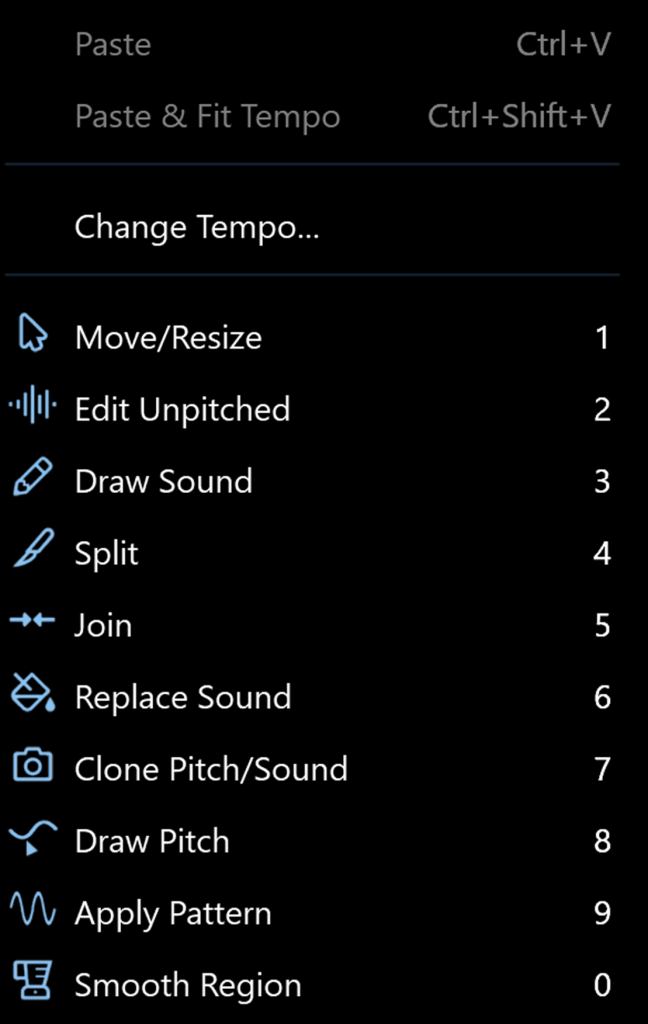
Then select this Edit Unpitched icon:
Alternatively, it can be selected from the toolbar at the top of the screen.
Once in Edit Unpitched mode, listen back to the section containing the noise you want to delete, identify and select it with the cursor and hit Delete. In the example below, we want to delete a mic pop from behind a live performance but this can also be used to delete vinyl crackle.
Users can also try moving a combination of the sliders found under the Clean / Repair menu – allowing live audio repair and clean-up features. In particular, Filter Background is useful for removing background noise such as in old recordings, whilst Tones & Hums and Purify provide a quick sweeping fix/improvement to a recording.
You can even adjust overtone levels in notes and even regenerate fundamental harmonics, to bring back bass presence in vocals and instruments, lost during mixing & mastering.
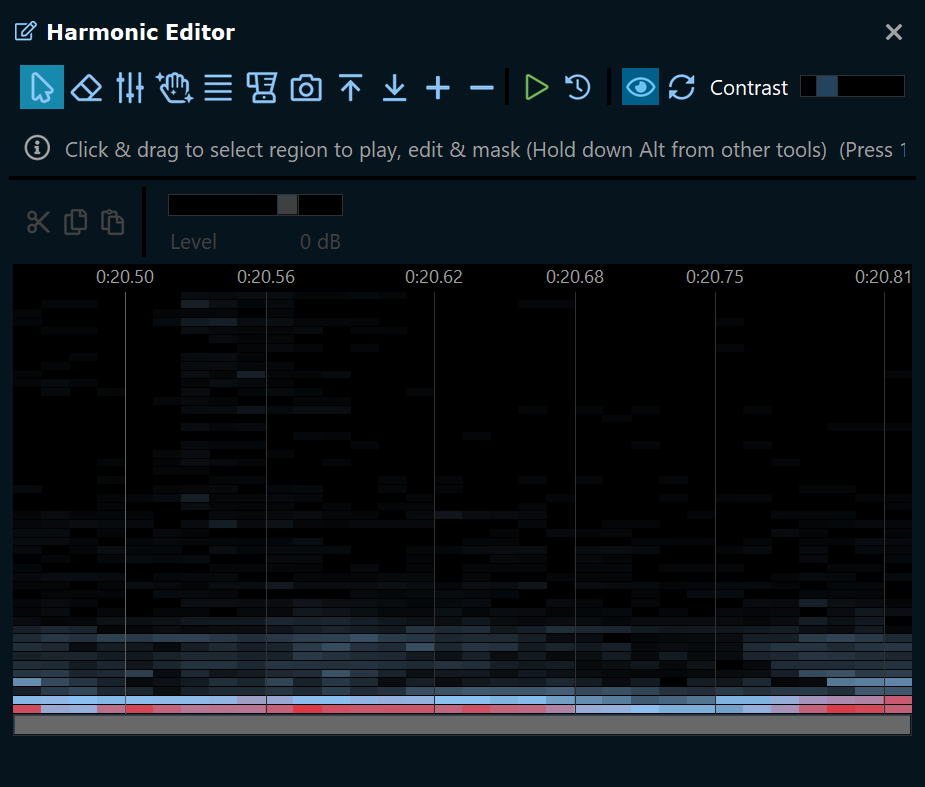
At a deeper, more surgical level, harmonics can be edited inside notes with Harmonic Editor.
You can choose from a number of tools in Harmonic Editor to further clean, erase and adjust notes, plus remove noise at the harmonic level, allowing supreme clean-up not available in the same way using any other stem separation software.

Available just beneath the menu bar or with a simple right-click of the mouse, DeepAudio also offers a toolbox called Audioshop to further manipulate notes. We’ve already covered how to use the Edit Unpitched Tool, but you may wish to slice notes using the Split Tool for finer clean-up, or use the Join Tool to glue larger sections of sounds and noise together to then delete, plus much more!
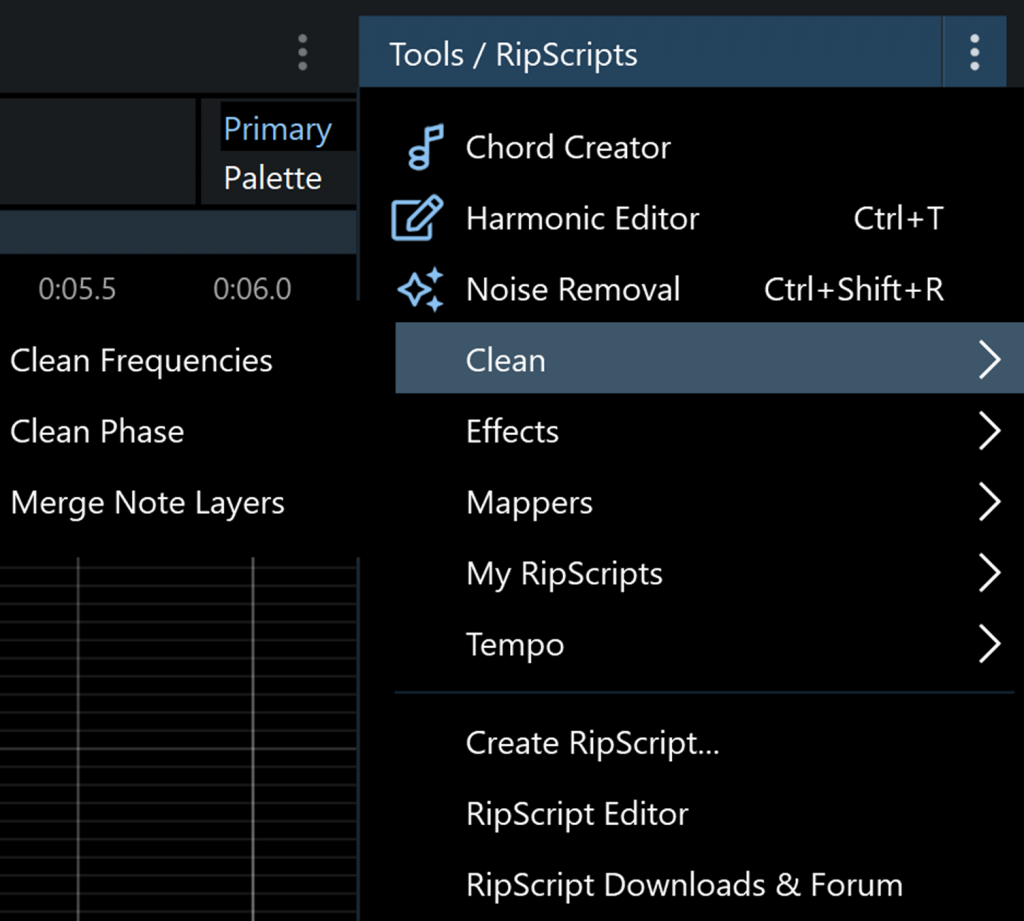
There are also some further RipScripts accessible under the Tools / Ripscripts menu that allow for clean-up of frequencies and phase.
Finally, for quick and easy noise removal, you can also adjust the volume sliders on the Layers Panel, as shown in this video:
Step 4 – Export
Once you are happy with your clean-ups and noise removals, simply choose File>Export and select the file format to export.
Most leading DAWs can open audio clips for editing with RipX DAW PRO. RipLink plug-ins are installed so that it can be used from Pro Tools and DAWs that support VST3 & ARA2, including Studio One, Cubase, Reaper & Cakewalk.
Ableton Live, Logic Pro X, FL Studio, ACID Pro, Digital Performer & Mixcraft users can set RipX DAW PRO as the external sample editor, or by using general audio import and export methods.
i work in sound post prtodution, i like ti have your tools v=can i get a discount please
Isn’t it time to update this page with some spiffy new in depth tutorials using the current version of your software? Maybe cough up a bit of change for a microphone that you can use. I’m in 2025. There are kids starting school who could hardly talk when this page was last updated.
Come on Hitnmix, you’ll become Hitnmiss if you don’t put some effort into demonstrating the “superiority” of your software; the current version that is. Is it really superior to all others in 2025? Maybe 12 to 24 months ago it was . Surely you’ve got someone who can create some decent in depth tutorials, showing us how “superior” RipX Daw is at stem cleaning.
In the not too distant future, someone is going to make RipX
Daw look as old as this web page. They’ll have tutorials on every platform and web pages with tutorials demonstrating every minute feature their software offers. Before long people will be saying; what was that software called? Rip something? Rest in peace?
You’ll need to do what Melodyne is doing. Putting out tutorial videos to stay relevant.
Nearly every video about your software is out of date. These videos on this page are 1 and 2 years old. Are there any videos currently in existence, made by you, besides the ones spruiking about your up upcoming VR update, that have decent tutorials about RipX Daw Pro or Standard anywhere, on any video platform or at least a website that’s not between one and three years old?. Tick tock, times a wasting. Is RipX Daw as good today, as you said it was 2 or 3 years ago? I don’t know whether it is or not. Maybe you can show me? 🤔