

In this blogpost, we’ll cover some of the most popular uses of RipX DAW for musicians, producers and audio professionals, as well as provide a step-by-step guide on how to quickly and easily use RipX DAW‘s Layers for recording parts, editing, applying effects and more.
Do you need to record audio or MIDI/MPE, or do groundbreaking work with original or separated samples and instruments, or with you pro-editing and clean-up workflow? No problem – obtain a free, 21-Day RipX DAW trial or get the latest version that’s right for you.
Many people want to record, edit and sequence music but often find existing audio apps, DAWs, VST instruments and effects plugins take a long time to learn.
We’ve re-thought how to create music on a computer from the ground up, using our Rip audio format. As explained in a previous blogpost, this treats all MIDI and audio recorded into RipX the same, so no separate handling of them is required, allowing sound to be manipulated without limit. In fact, waveforms aren’t even used when creating music within RipX, and are only generated when playing back or exporting. Conveniently, RipX DAW’s dedicated note detection and piano roll enables you to see all notes to parts as the play cursor moves through them.
Part 1 – Understanding how Layers work
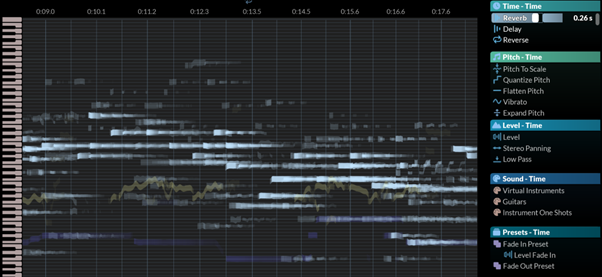
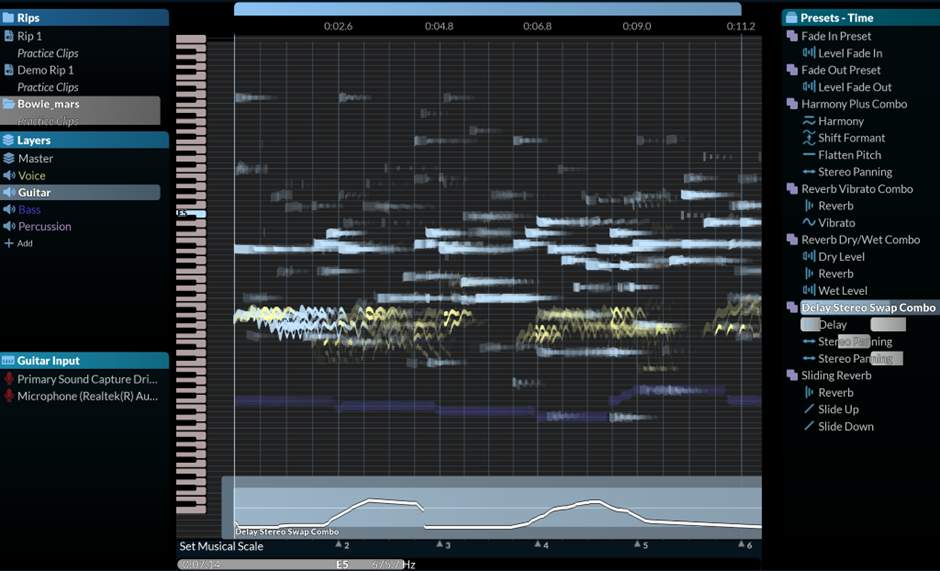
As with all RipX DAW modules, Layers are central and function a bit like tracks in a DAW.
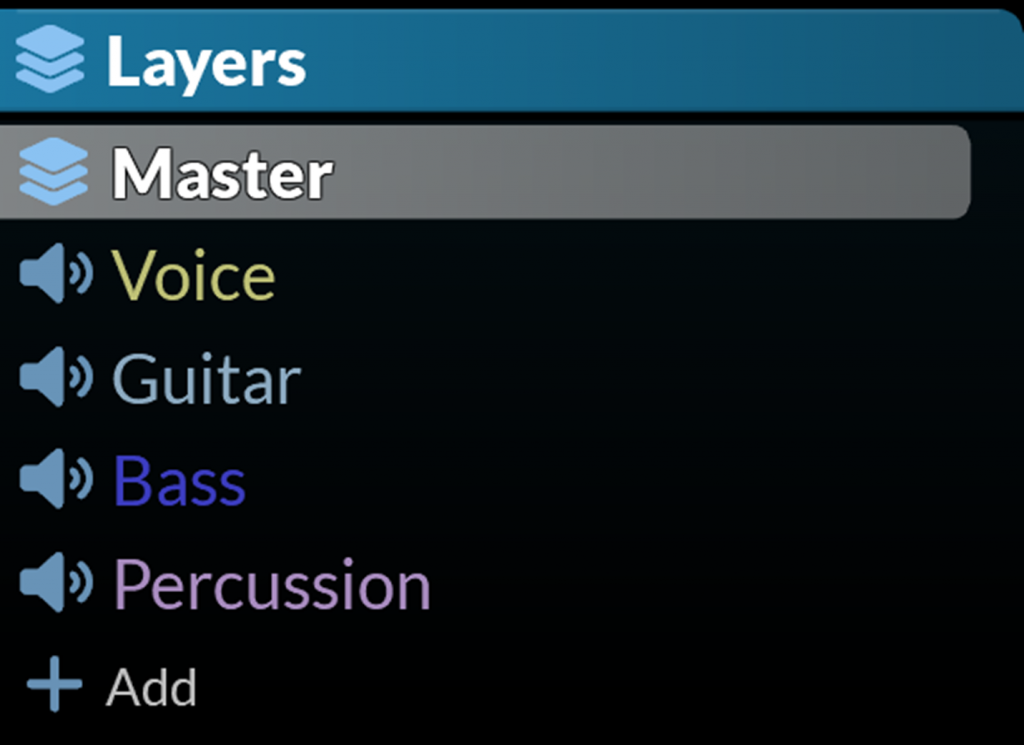
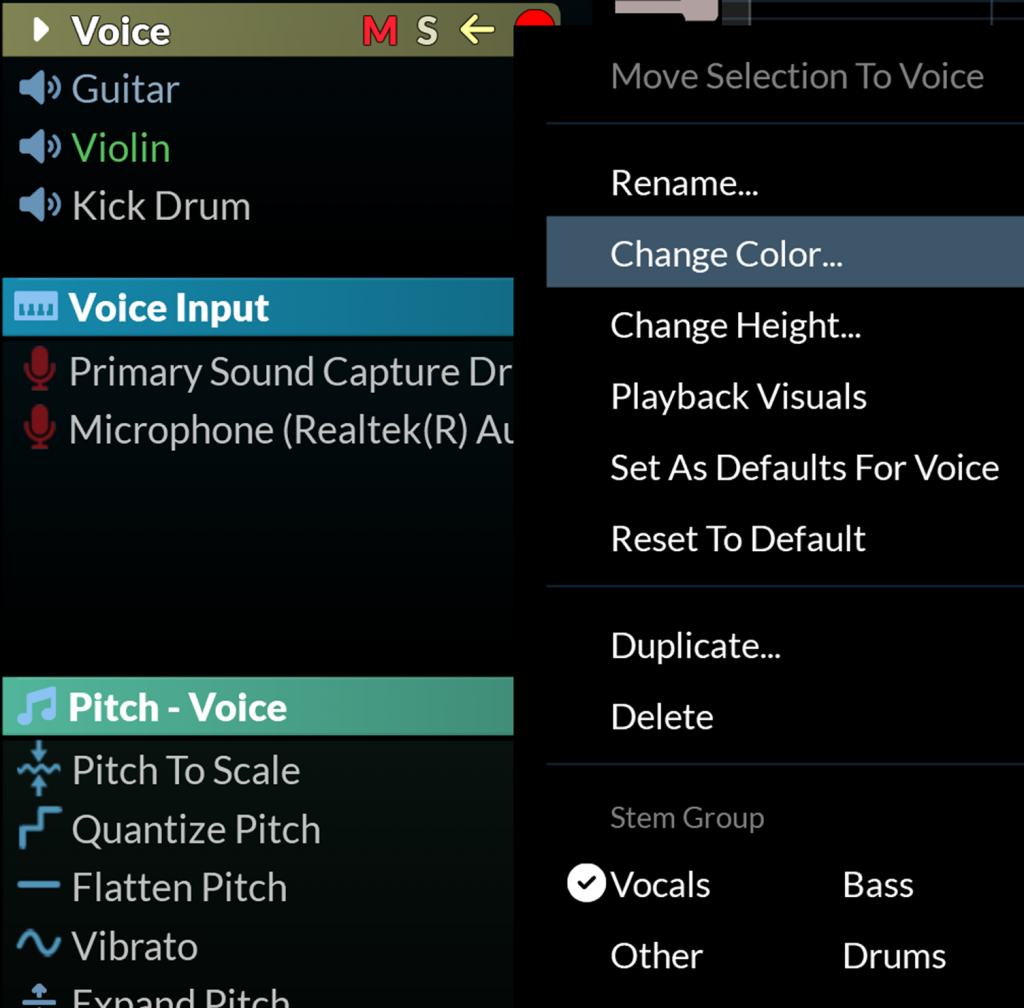
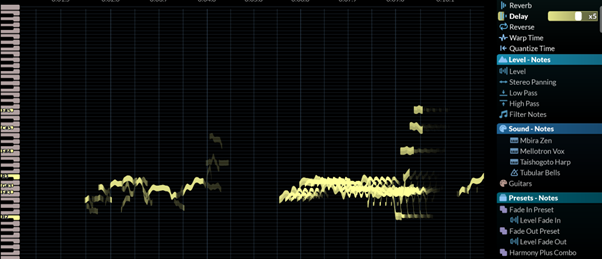
Select any Layer by clicking on it. Then all editing is restricted to that Layer and it will be highlighted in a default color. To change it to a color of your choice, simply right click the Layer and select Change Color. For easy reference, all RipX DAW functionality will then be colored appropriately when editing or processing that Layer. For example, Voice defaults to yellow, and when it is the selected Layer, any applied effects and sounds in the Panels will also be colored yellow.
Note that clicking on a Layer is different to soloing it, as you will still be able to hear the whole rip when playing it back, but you won’t affect other Layers when editing.
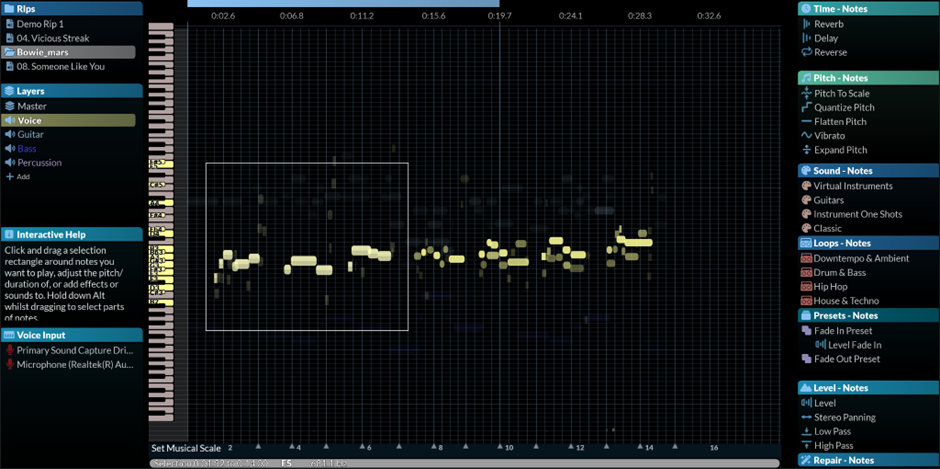
Try time-selecting the entire chosen Layer by clicking on it once again, or by triple-clicking on the background and then audition an effect that is quite visual (like Vibrato) by hovering over it in one of the Effects panels.
Note that you can also press Cmd/Ctrl+A (Edit>Select All) to select all time if most notes are originally audio, however all notes will be selected individually if the majority were created from a MIDI recording or added from the Sound Panel.
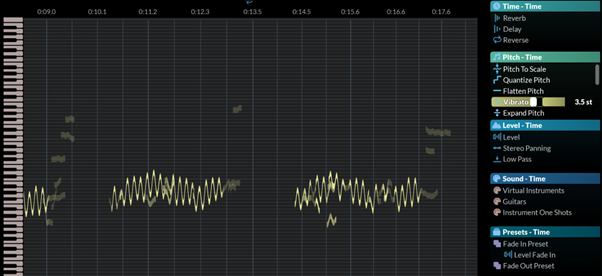
The above shows how it is applied to the selected Voice Layer only, colored yellow.
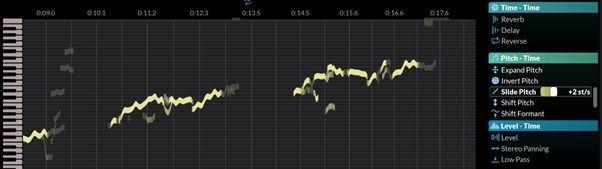
If you then click a different Layer such as Guitar and audition a different effect, such as Reverb (you will notice you don’t need to re-select time – it remains as you left it), you will see its color (light blue this time) being used and the effect applied to just the Guitar notes in the timeline.
Once you are happy with how an effect might sound whilst auditioning it, simply left click to apply it to the selected Layer and lock it in place. Note that you can also audition during playback, and you may want to drag out a Loop marker first in this instance.
Multiple Layers can also be selected using Cmd/Ctrl+click, and effects will be applied to all selected Layers at once.
Part 2 – Assigning inputs and controllers to Layers
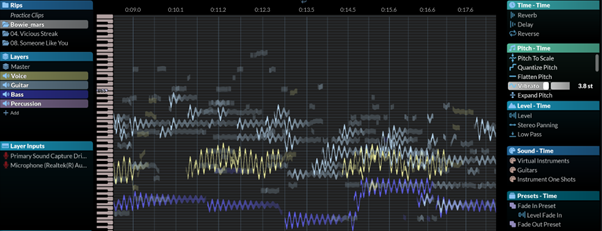
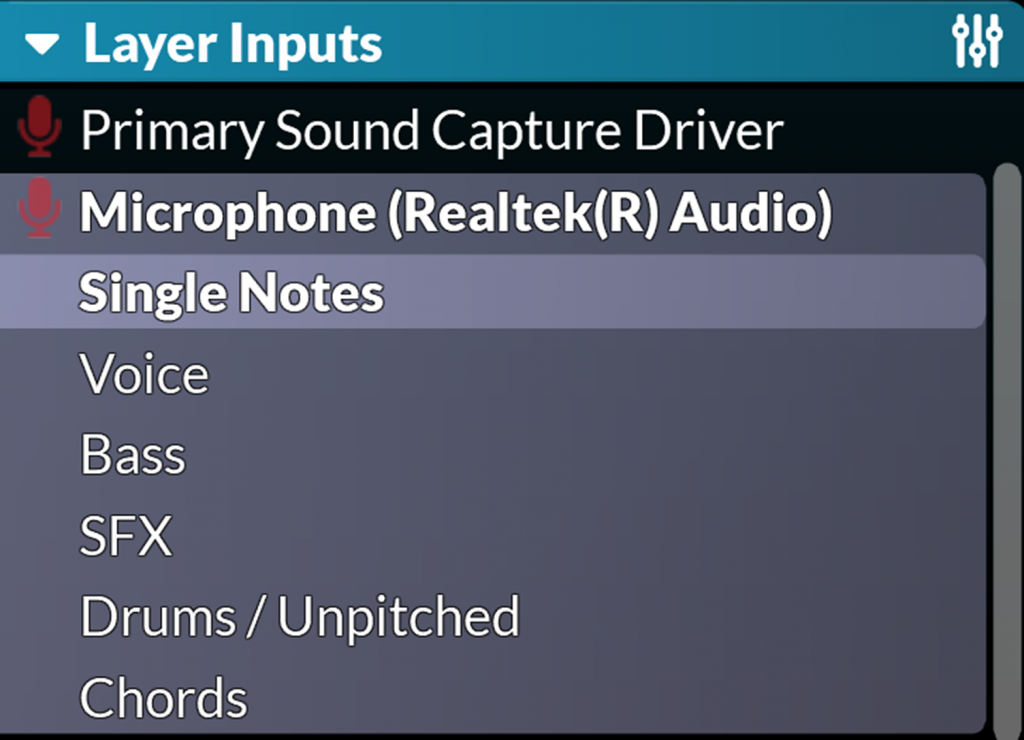
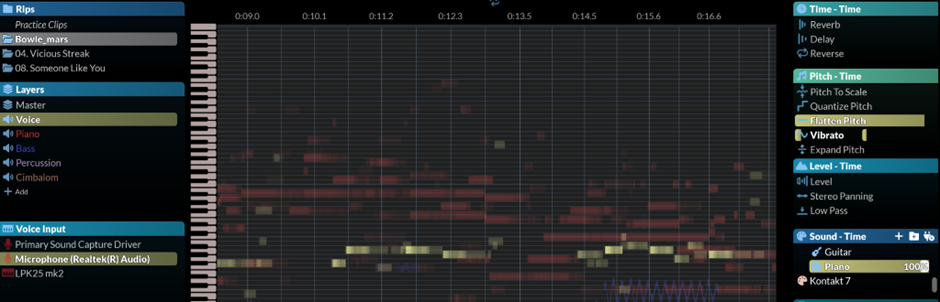
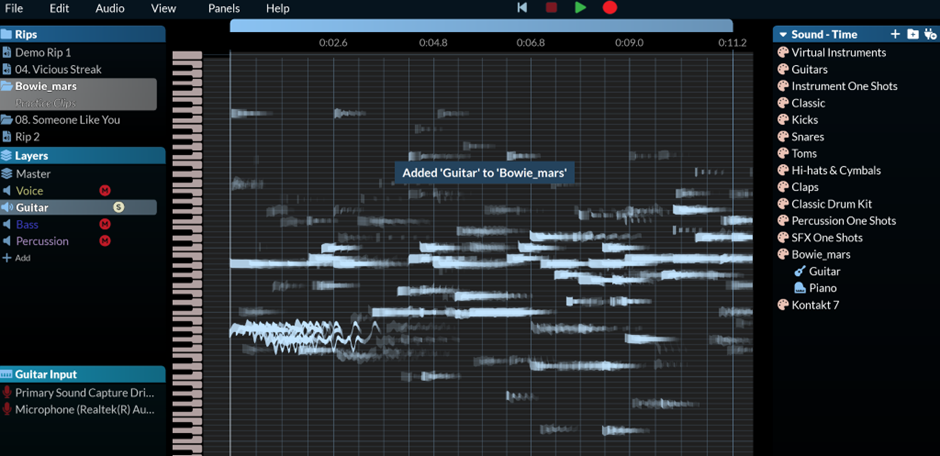
When it comes to recording, once again Layers are central. Select the Layer you want to record into, then open the Inputs Panel and select either a MIDI/MPE controller or an audio device such as a microphone or instrument input. The device selected for each Layer is remembered, so next time you open RipX, you can just click the record button next to a Layer and record straightaway using the same device, whether it be MIDI or audio.
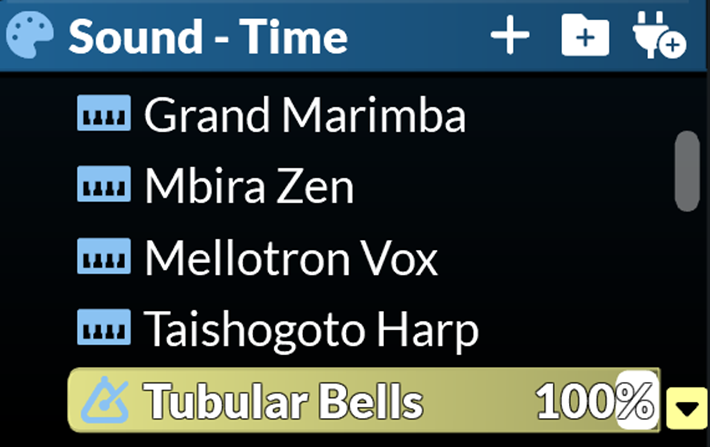
For the Layer selected, you can set the sound(s) or sample(s) to be recorded from the Sound Panel. First, ensure nothing is selected by clicking on the background (otherwise you will apply the sound to the selection). Then double-click to clear any existing sounds chosen and set a sound to 100%. You can then add notes using this sound in the following ways:
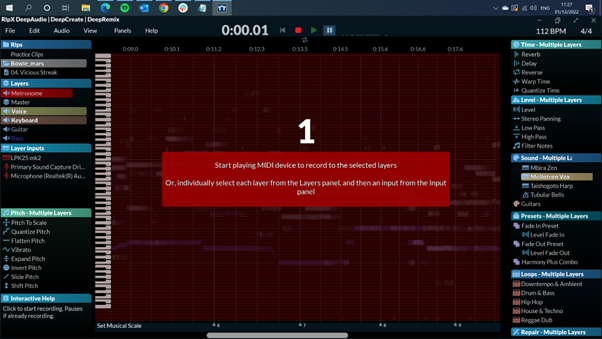
* Press Record and play via your MIDI controller or microphone and perform into the selected Layer (more below).
* Click and drag sounds one-by-one from the Sound Panel onto the Layer to assemble and sequence manually. If a note is currently selected, you will need to drag the sound up/down a little first to prevent updating the selection.
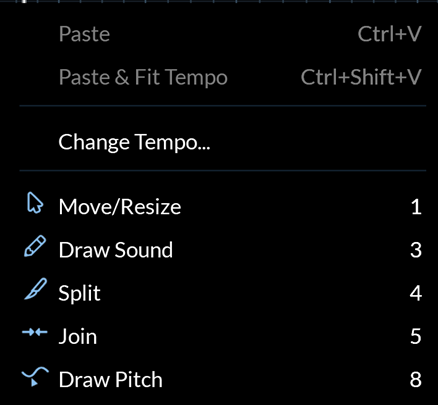
* Right-click over the rip, choose the Draw Sound tool and click and draw notes onto the Layer.
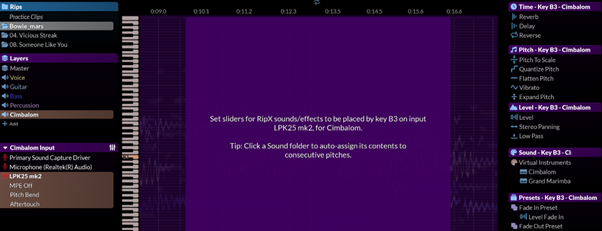
* Assign the sound to your choice of notes on a MIDI controller by pressing the  icon in the Inputs Panel, then playing a key, then set the sound in the panel. Double-click a sound folder to auto-assign each pitch from the played key upwards to the folder’s contents.
It is good to know that any MIDI played before pressing Record will be stored as Practice Clips. This is useful if you come up with ideas but forget to record them, or if you want to retrace your steps when experimenting. Click Practice Clips beneath the rip name in the Rips panel to show these.

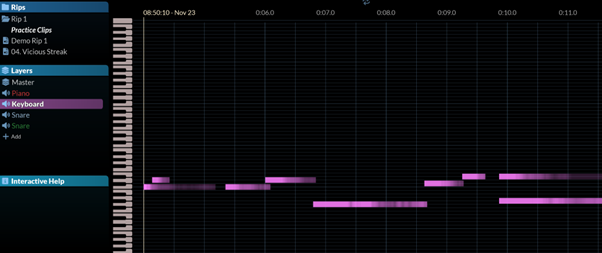
When ready, to record into a Layer, simply hit the  button and a countdown timer will start to prepare you for recording. As you record a part, the notes will appear on-screen in real-time.

You can one-click record into new or existing Layers, by pressing the red record button to the right of the Layer name. Then wait for the count-in and perform your part. You can even record multiple Layers at the same time (i.e. voice and midi or guitar together) by selecting them both and hitting record.
As well as being able to time-select any Layer, you can also select individual notes by clicking them, or clicking and dragging over them. Note that if you want to edit/replace unpitched sounds (like breath and sibilants for a Voice Layer), these are shown at the bottom of the screen and will need selecting too – alternatively make a time-selection over what you want to edit.
It is important to remember that effects often behave differently for note and time selections. For example, you could apply a Delay effect to a selection of notes only, with each note having an individual effect (each delays independently), whereas with a time-selection they all delay together.
Also note that if a Sound is applied to a note, it overrides any Sound that is applied to a time selection the note might be part of. Therefore if you want to replace the sound of notes recorded using MIDI (or dragged from the Sound panel) you will need to first select the notes rather than time.
You can also group notes together by pressing Cmd/Ctrl+G to edit them as a block and can also apply effects across the whole group.
Part 3 – Blending together and replacing Sounds, Samples and Instruments
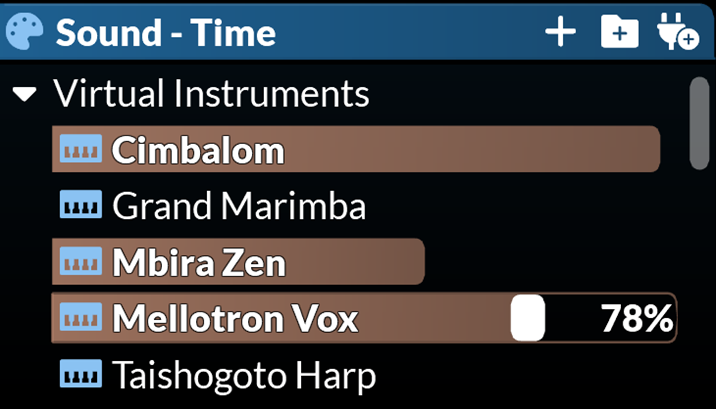
RipX DAW allows you to audition, drag and set multiple sliders to create a blend of effects, sounds, samples or instruments, and even replace existing sounds. For example, if you are singing and you want your voice to turn into a Piano or include elements of a Piano with the voice, set both Piano and Flatten Pitch (as piano is quite constant) to 100%.
This can be done with any sound, sample or instrument and is a unique and extremely creative feature of RipX DAW. Simply time-select a Layer containing a part, and set the slider of a new sound to a 100% to hear the difference. The creative possibilities for this are endless. Give it a go!
Part 4 – More on the Sound Panel, plus using Effects and automation
RipX DAW also makes it possible for any effect, sound, sample or instrument to adjust over time. This is done using automation lanes that appear at the bottom of the screen (they can also be moved and resized) when hovering over an assigned effect. Click on the assigned effect, sound, sample or instrument to keep the lane visible for editing. Then click in the lane to select it (as there may be multiple ones shown for different selections), and click again to set linear changes, or click and drag for flexible changes.

You can add multiple effects, sounds, samples or instruments to the same selection, and adjust the automation lane to blend them between others over time. All can be adjusted over time in the same way.
You can also click a note, press Cmd/Ctrl+C to copy it, then select an automation lane and press Cmd/Ctrl+V to paste. For example, if you wanted to reuse the vibrato on a note you had on a recording and apply it to other notes, you could paste it to a Shift Pitch effect and create a preset effect by subsequently dragging the effect to the Presets Panel (more on presets below).
RipX DAW is intelligent in the type of information it pastes. For example, it will paste the pitch changes of a note onto a Shift Pitch effect, and amplitude changes onto a Level effect. You can even drag Layers onto automation lanes in a similar way – for example to a Compression effect, to act as a side-chain compressor.
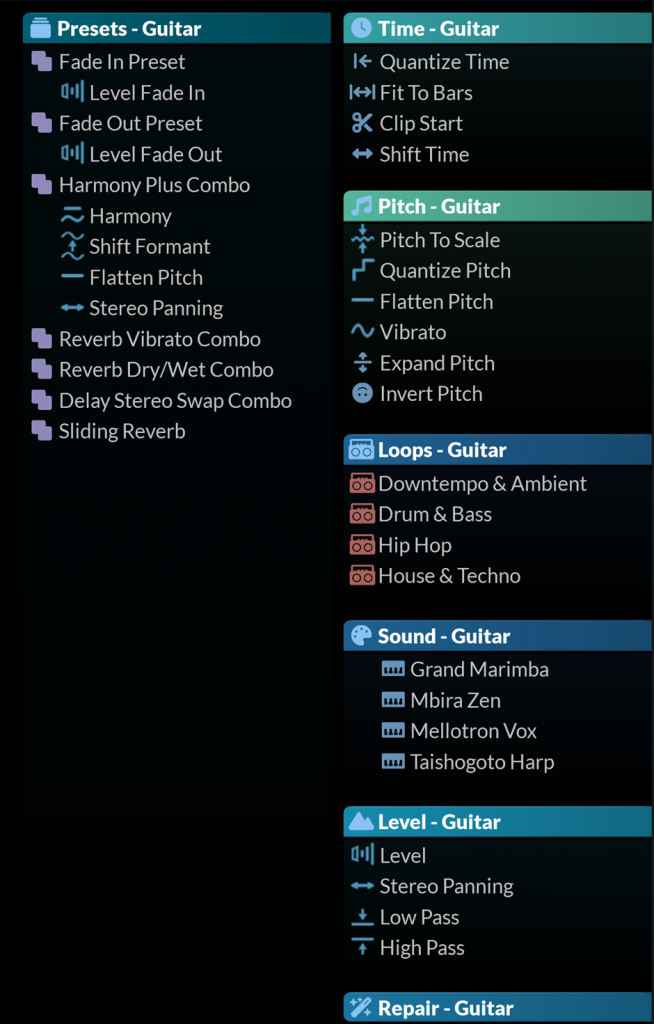
Part 5 – Using Effects Presets and Combos
You can even store any effect and its automation lane as a preset to use elsewhere.
Drag the effect up/down (so that the entry moves rather than the level of anything selected) and then across to the Presets Panel.
Drag effects/sounds onto each other to create a Combo Effect preset containing multiple effects/sounds.
Note that the order of effects changes the overall Combo Effect.
It is useful to know that RipX DAW’s flexible UI makes it possible to arrange Panels how you want: You may like to drag the Presets Panel to the left of the right-hand Panels so it has its own column and plenty of space for experimentation.
You can also collapse Panels, and even remove them using the Panels menu at the top.
Part 6 – Adding your own Sounds
But that’s not all. RipX DAW is after all the ultimate audio playground where anything goes!
For example you can change drum sounds within an existing recording, simply by selecting the appropriate drum Layer, like Kick Drum, triple-clicking the background to select all time, then double-clicking one of the supplied drum sounds in the Sounds Panel.
But what if you want to use your own sounds? You can add sounds from any rip to the Sounds Panel, to either audition, drag and sequence in a new layer, assign to existing notes, or perform on your MIDI/MPE controller, by selecting a note (or notes) and clicking the + icon in the Sounds Panel title bar.
Do this several times for differently pitched notes within a rip and RipX DAW will then choose the closest pitched note when you play back newly recorded notes. For example, if you have an instrument, like a guitar, and you’d like to be able to play several differently pitched notes with it on a MIDI keyboard/MPE controller, this is how you make this possible.
You can also add existing samples using the  button.
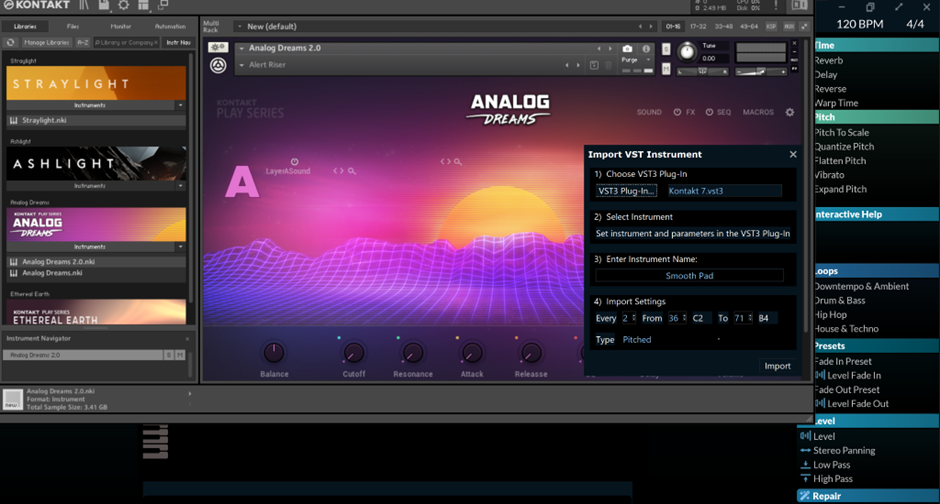
What’s more, you can rip your favorite VST3 instruments by clicking  . Choose what pitches are imported and once the sounds, samples or instruments are imported, they can be used like any other.
Part 7 – The Audioshop Tools, detecting & changing keys, and exporting
When right-clicking the rip in RipX DAW you get access to a selection of RipX DAW PRO’s Tools.
So you could draw a note into a Layer using Draw Sound, redraw the pitch of notes using Draw Pitch plus use the Split and Join tools.
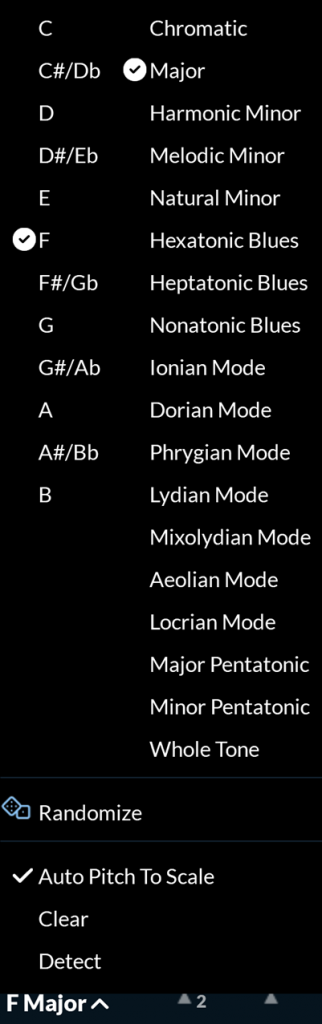
Furthermore, by clicking Set Musical Scale in the bottom left corner of any rip, you can detect and change the key of any rip! With Pitch To Scale and Randomize turned on, it’s especially useful for testing different chords.
Try entering a single note and using the Chord effect to create different variations on the instrument of your choice.
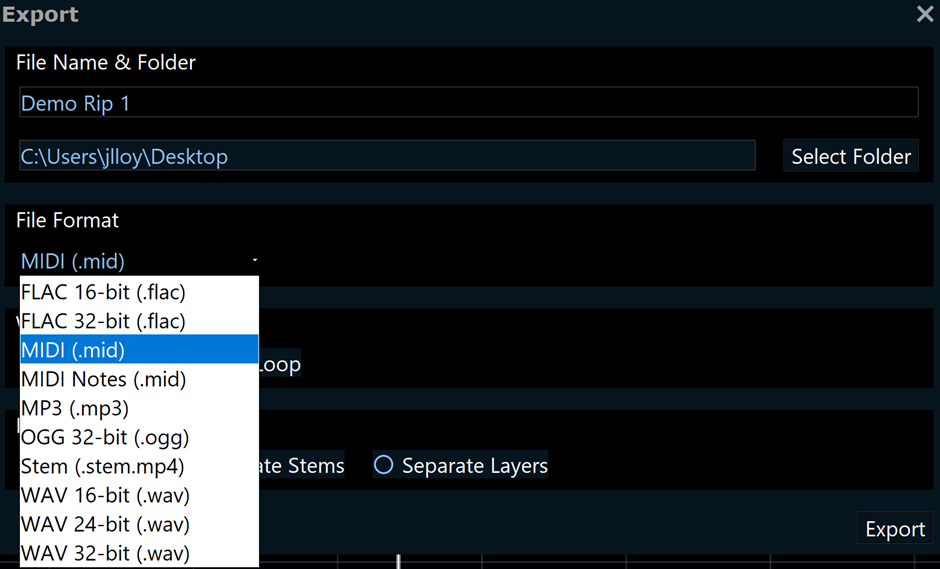
Once you’ve created your masterpiece, click File>Export (Cmd/Ctrl+E). Under the Export menu, you can choose to export in the file format of your choice. Even MIDI: Exporting ripped and edited Layers as MIDI files and importing them into your DAW, then setting them to different VST instruments opens up a whole world of creative possibilities and is yet another powerful use of RipX!
As you can see, there are many combinations within RipX DAW to get stuck into creatively. All of its capabilities are always on display without hidden menus or dialog boxes, so making music and editing audio requires less thinking about how to do things, letting you get on experimenting with your ideas!
Better yet, when you buy or upgrade to RipX DAW PRO, you get all core RipX DAW functionality, plus the many clean-up usages of RipX DAW PRO!
Check out these videos, which take you through RipX DAW with audible examples:
Disclaimer: Screenshots are for illustrative purposes only and are not intended to be indicative of recommended or authorized use.
Can you record a guitar or bass into RipX DAW thru an audio interface or does this only allow MIdi recording?
You can also do that. I recommend giving the trial a go, available from https://hitnmix.com/download-ripx/