
In this blogpost, we’ll cover how to quickly and easily use RipX DAW PRO with another DAW, proving that RipX DAW isn’t just a standalone app, but a flexible, Future Audio Platform that can be integrated seamlessly into your studio workflow.
Need to extract, transfer and edit parts from ANY song or ANY audio file via your DAW into RipX DAW and back? No problem – get a free, 21-Day RipX DAW trial or buy RipX DAW PRO and simply install the RipLink plugin included. At present, if you only own our RipX DAW, you won’t be able to transfer and edit audio as seamlessly via your DAW as it operates as standalone software only – not as a VST plugin or with ARA included. But aside from the workflows covered in our RipX DAW PRO for Superior Stem Clean-Up and Noise Clean-Up blogposts, there are many other added benefits from purchasing or upgrading to RipX DAW PRO. One of these is gaining access to a super-efficient workflow within most other major DAWs using the RipLink VST/ARA & AudioSuite plug-in, meaning you can automatically send audio to RipX DAW for editing from another DAW.
Most leading DAWs can open audio clips for editing and RipLink plug-ins are installed so that it can be used from Pro Tools and DAWs that support VST3 & ARA2, including Studio One, Cubase, Reaper & Cakewalk.
Ableton Live, Logic Pro X, FL Studio, ACID Pro, Digital Performer & Mixcraft users can set RipX DAW as the external sample editor, or use standard audio import and export methods.
But let’s look at a typical RipX DAW PRO RipLink Audiosuite plugin workflow with Pro Tools and how to integrate the two programmes.
Step 1 – Transfering audio from Pro Tools into RipX DAW
As mentioned previously, audio clips can be directly sent from most leading DAWs to RipX DAW PRO for editing. This is thanks to the RipLink plug-ins, automatically installed with both modules that can be used with Pro Tools, and DAWs that support VST3 & ARA2, including Studio One, Cubase, Reaper & Cakewalk.
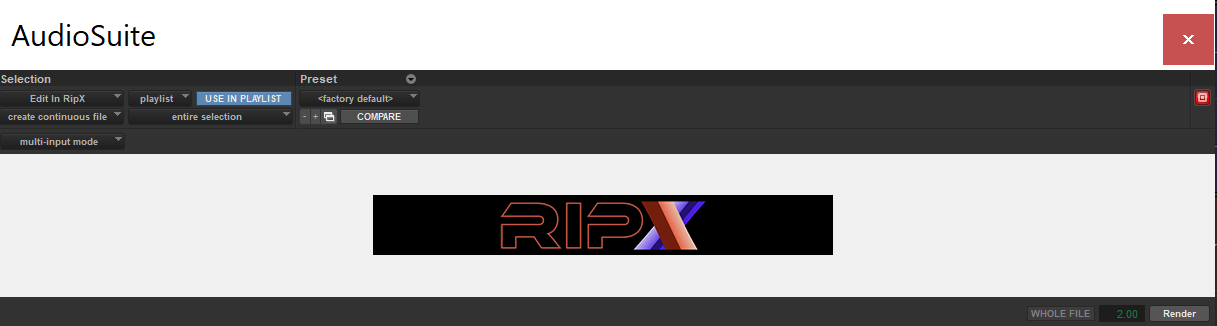
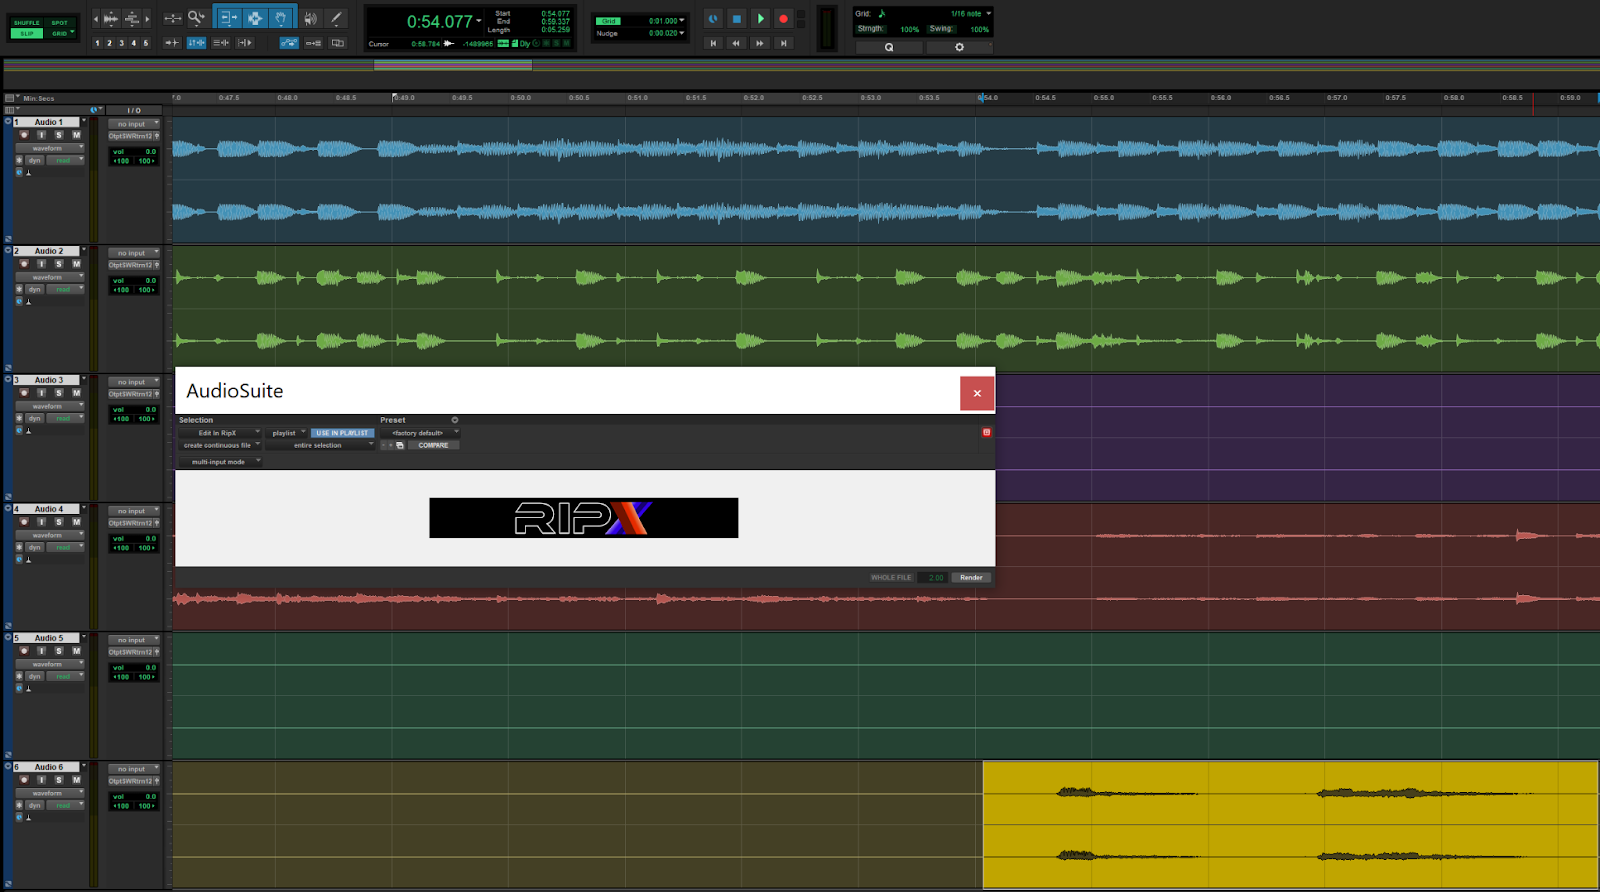
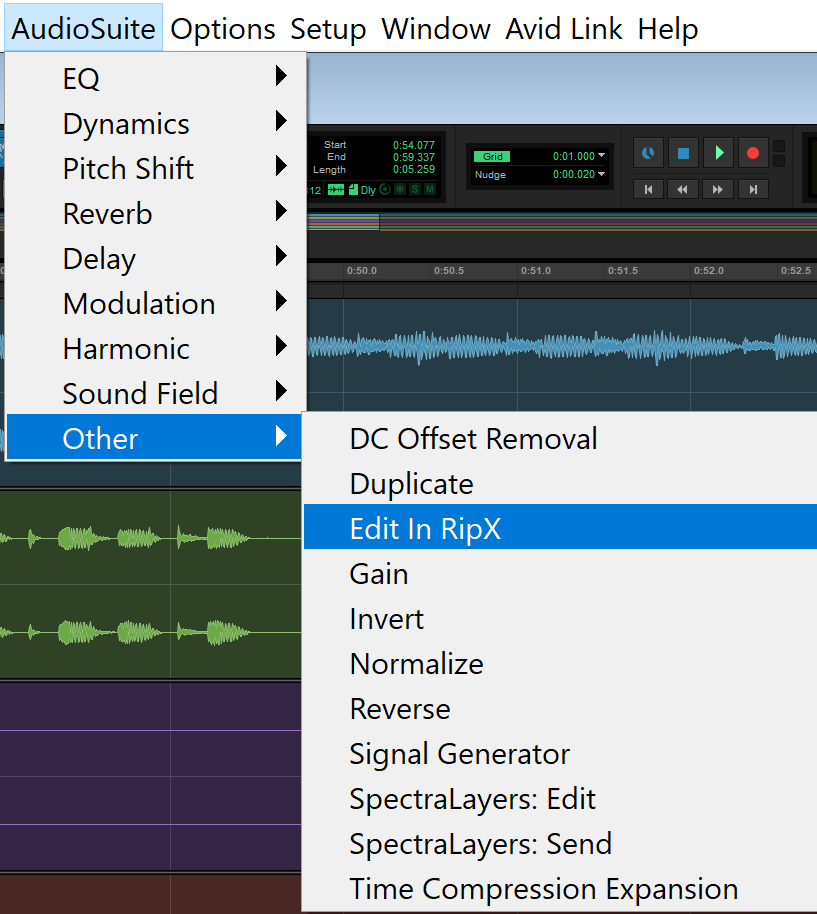
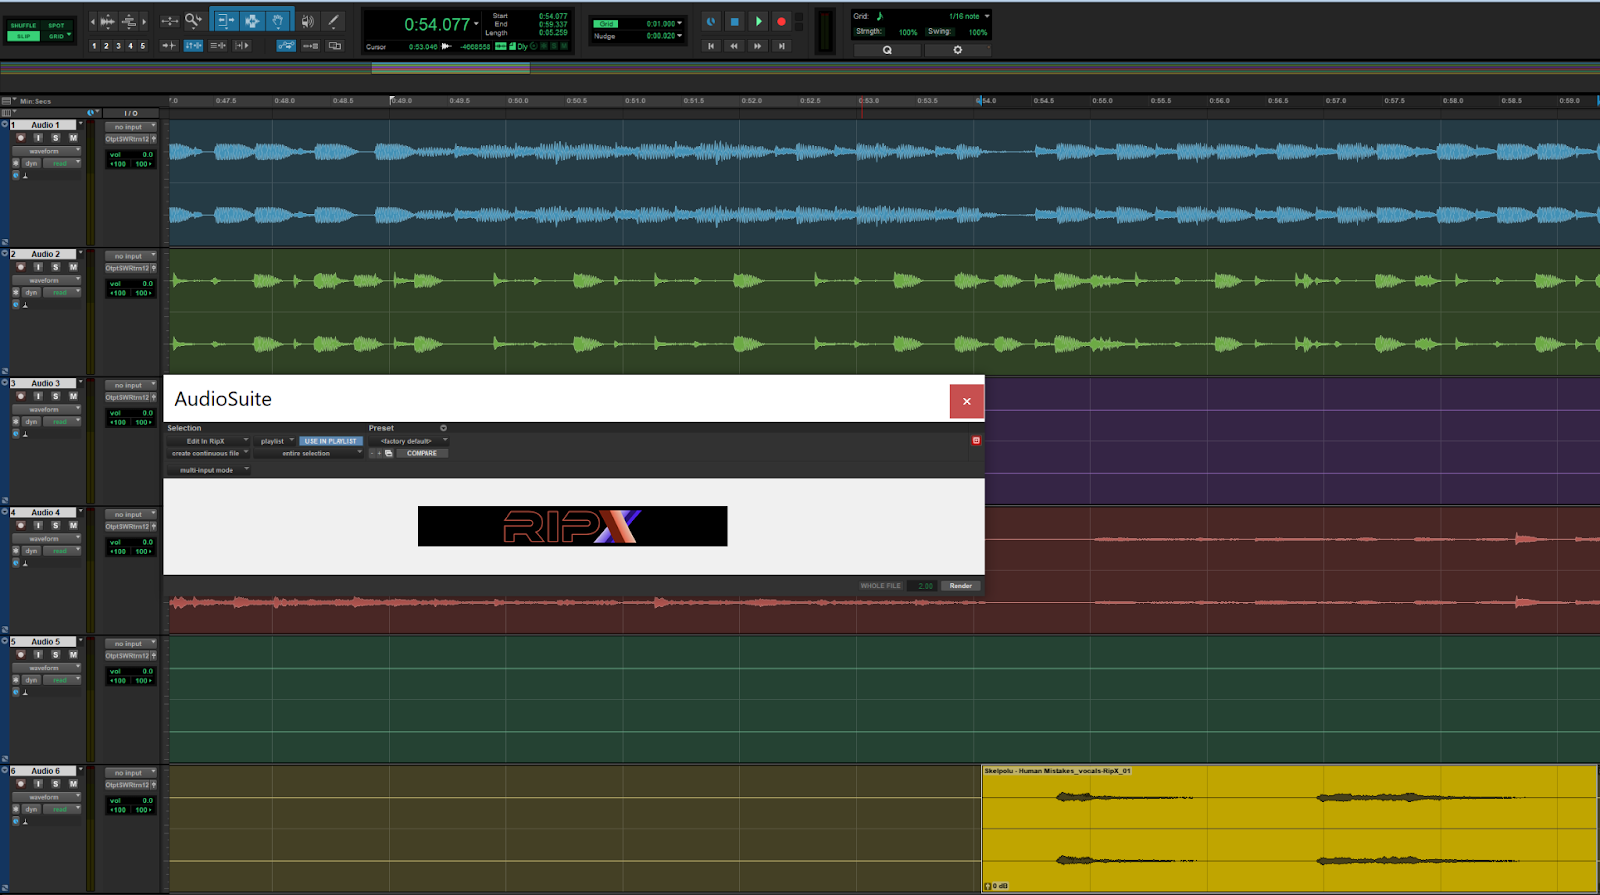
As a basic example, let’s transfer a vocal part from Pro Tools into RipX DAW, re-pitch a note and then transfer it back to Pro Tools. To do this, first select the audio segment of the vocal to process by left-clicking and dragging right with your mouse, then open the RipLink Audiosuite plugin by clicking Edit in RipX under AudioSuite>Other.

Click Edit in RipX in the plugin window and RipX should automatically open.
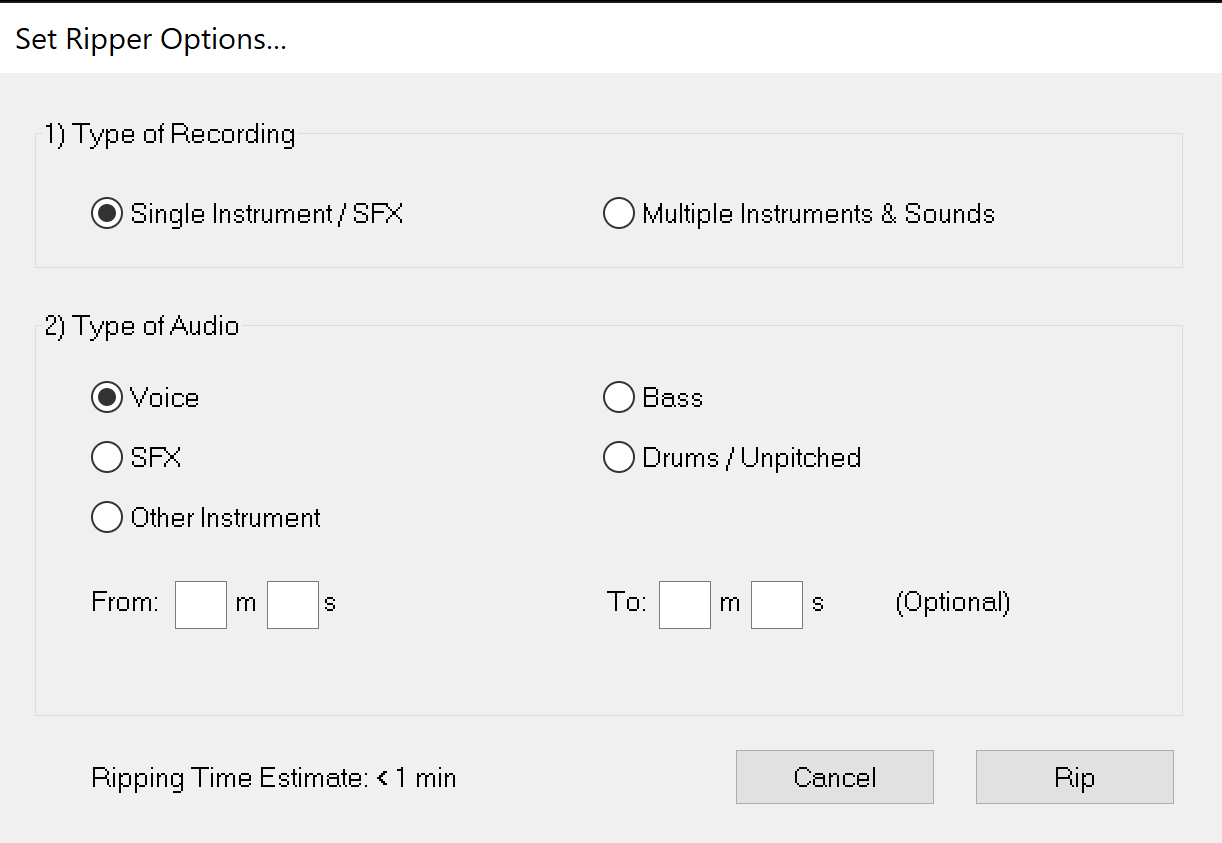
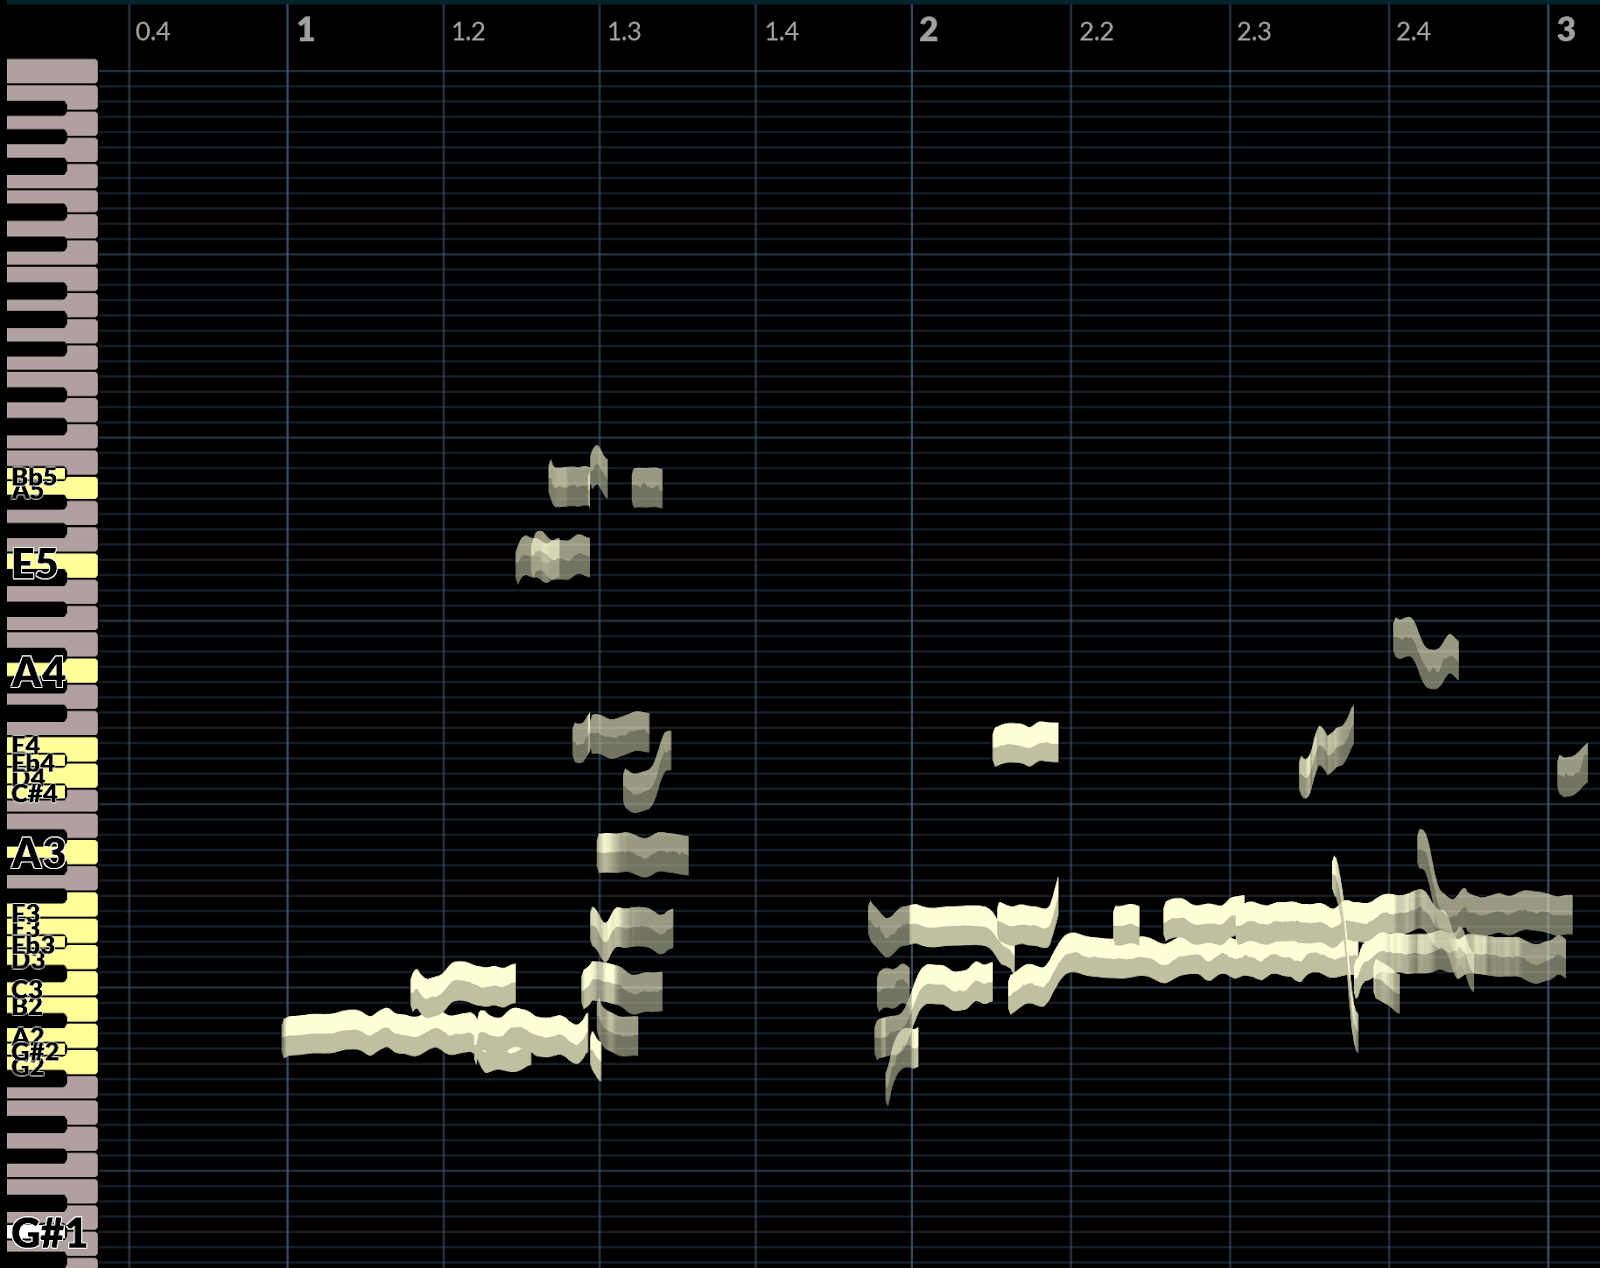
Select the Voice / SFX ripping option, click Rip and you should see it start ripping then appear in the RipList and the transferred vocal notes on-screen.
Step 2 – Re-Assigning Wrongly Recognised Notes in RipX DAW
After transferring the audio into RipX DAW, depending on the type of recording, plus the density of the mix and other factors, elements of some parts may have been wrongly assigned to incorrect Layers, so sometimes there may be a bit of tidy‑up work required to identify, say, fragments of a vocal that have been mis‑identified as a violin. To re-assign these notes back to their correct Layer, simply identify and highlight or click on them with your mouse, and then click on the arrow next to the correct Layer they need to be re-assigned to. The notes will then be moved to that Layer and changed to that Layer’s color (which is customisable by right-clicking on the Layer in the Layers Panel).
Step 3 – Edit your transferred audio in RipX DAW
Press spacebar or left-click the play button to listen back to the transferred vocal notes.Next, select the note to re-pitch and hit the Up arrow key three times. This is just a basic example but feel free to edit your transferred audio however you wish within RipX.
Step 4 – Transfer your edited audio back into Pro Tools
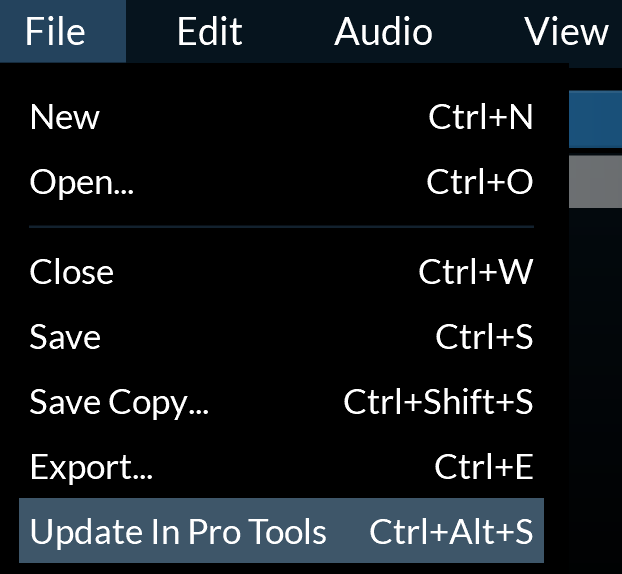
Once you’ve finished editing your audio in RipX DAW, under the file menu, select Update in Pro Tools. Then in Pro Tools, click Update in the RipLink Audiosuite Plugin and the newly edited vocal will automatically replace the original.
Press spacebar to listen to it back in Pro Tools.
This is obviously a very basic example, but the same workflow can be applied to multiple use cases, however simple or complex, whether in music, sound design or audio post.
Try RipX DAW PRO Free for 21 Days Learn About RipX DAW Learn About RipX DAW PRODisclaimer: Screenshots are for illustrative purposes only and are not intended to be indicative of recommended or authorized use.
Can I import adobe audition multitrack session files (*.sesx) into ripx daw?
That’s not possible but you can export audio files (WAV, MP3, FLAC etc.) from Adobe Audition which you can then open with RipX DAW.
Is a direct integration into Logic also planned? Can I use external VST in RipX Daw?
The RipLink plugin is a VST3/ARA2 plugin and unfortunately VST plugins are not currently supported by Logic Pro. However, it is still possible to use RipX DAW PRO with Logic by setting it as its external sample editor. Information on how to do this can be found on pages 54-56 of the manual which can be accessed from RipX DAW’s Help menu. Only VST3 instrument presets can be ripped into the Sounds Panel, not any effects plug-ins or effects plug-in presets. All effects processing is done natively in RipX DAW. Information on how to import VST3 instruments can be found on pages 38-39 of the manual.